Great news for Clarion users. You can now access Figurenotes colours and patterns within the instrument.
“Figurenotes is an incredible resource, and we’re thrilled that it’s now accessible to musicians who play Clarion. We hope this will create new opportunities for many more musicians to make music their way!”
Barry Farrimond-Chuong MBE CEO, Open Up Music
What is Clarion?
The Clarion is an innovative, accessible instrument that can be played expressively with any part of the body, including eye movement. Created by Open Up Music, it has been used within Open Orchestras and other projects for many years. Try it for free on iPad and PC. To unlock more features you can purchase Clarion Education Licences.
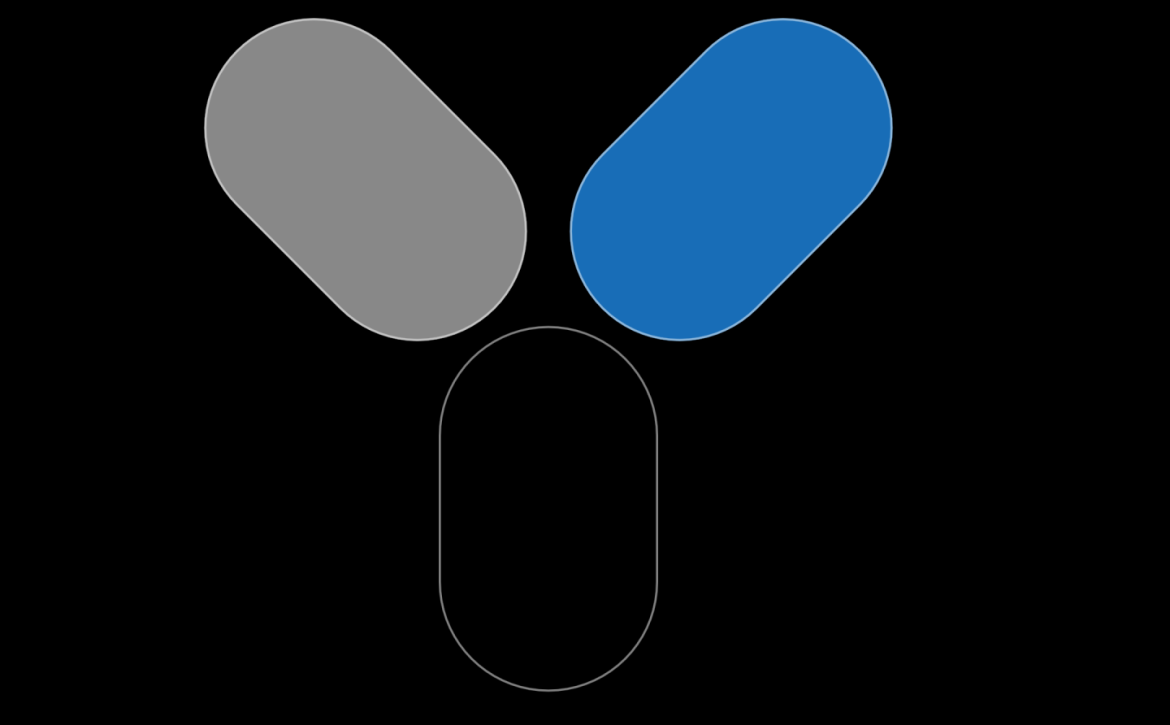
A Clarion pattern
BBC Ten Pieces
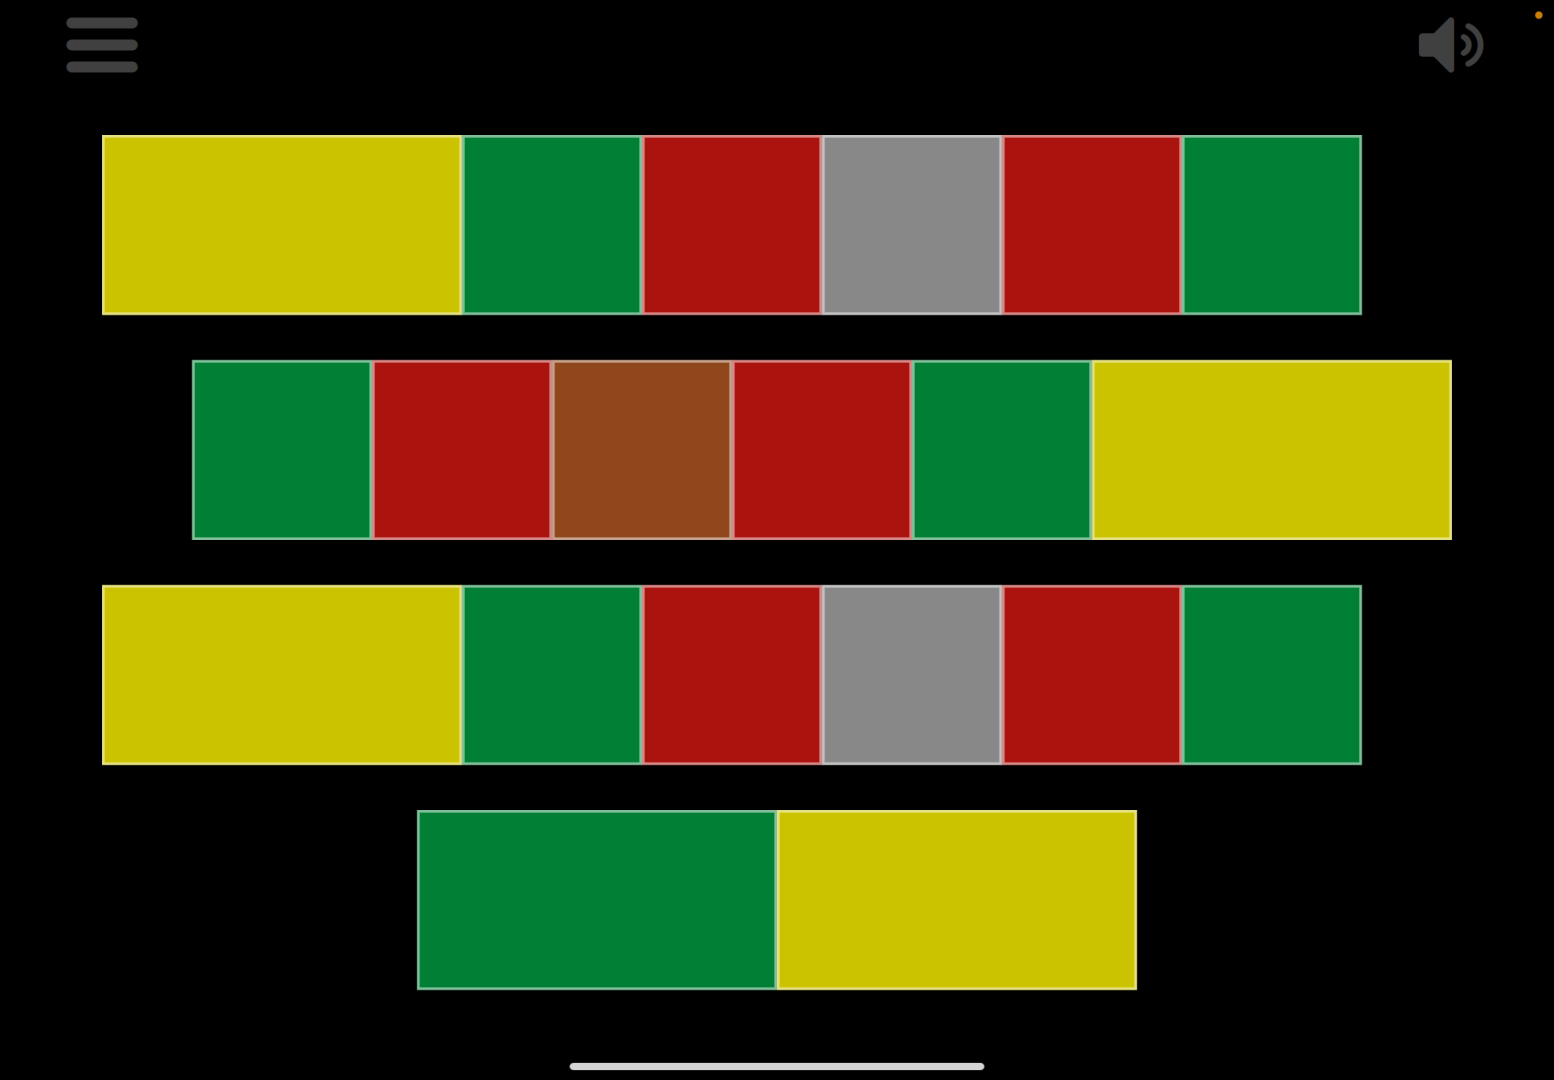
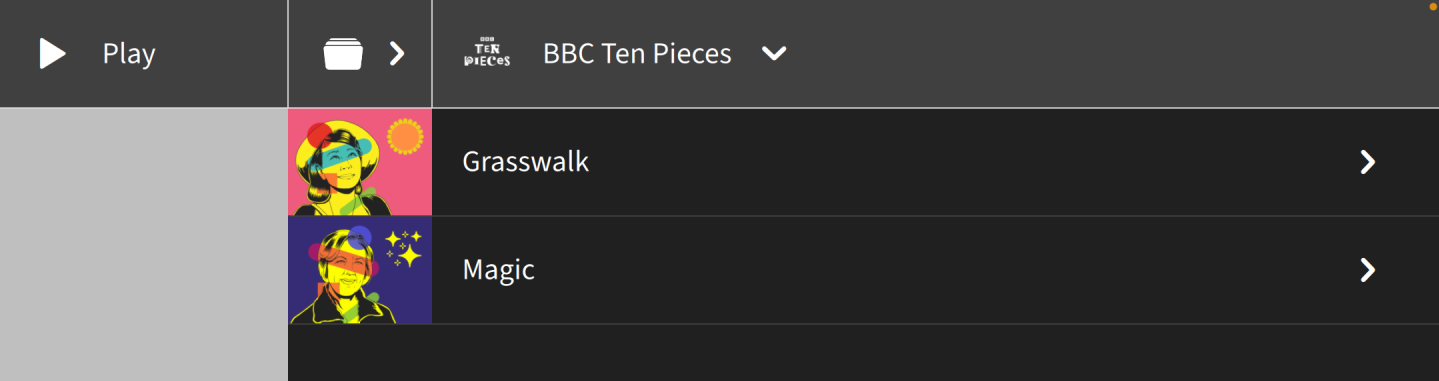
Excitingly, the patterns for the BBC Ten Pieces open score arrangements are already available in Figurenotes colours within the app. Clarion users can play some ridiculously fun game music in Laura Shigihara’s Grasswalk from Plants vs Zombies, as well as the mystical imaginings of Judith Weir’s Magic from Storm. To find out more about BBC Ten Pieces Figurenotes resources, see our blog explaining what is available.
How to find Figurenotes
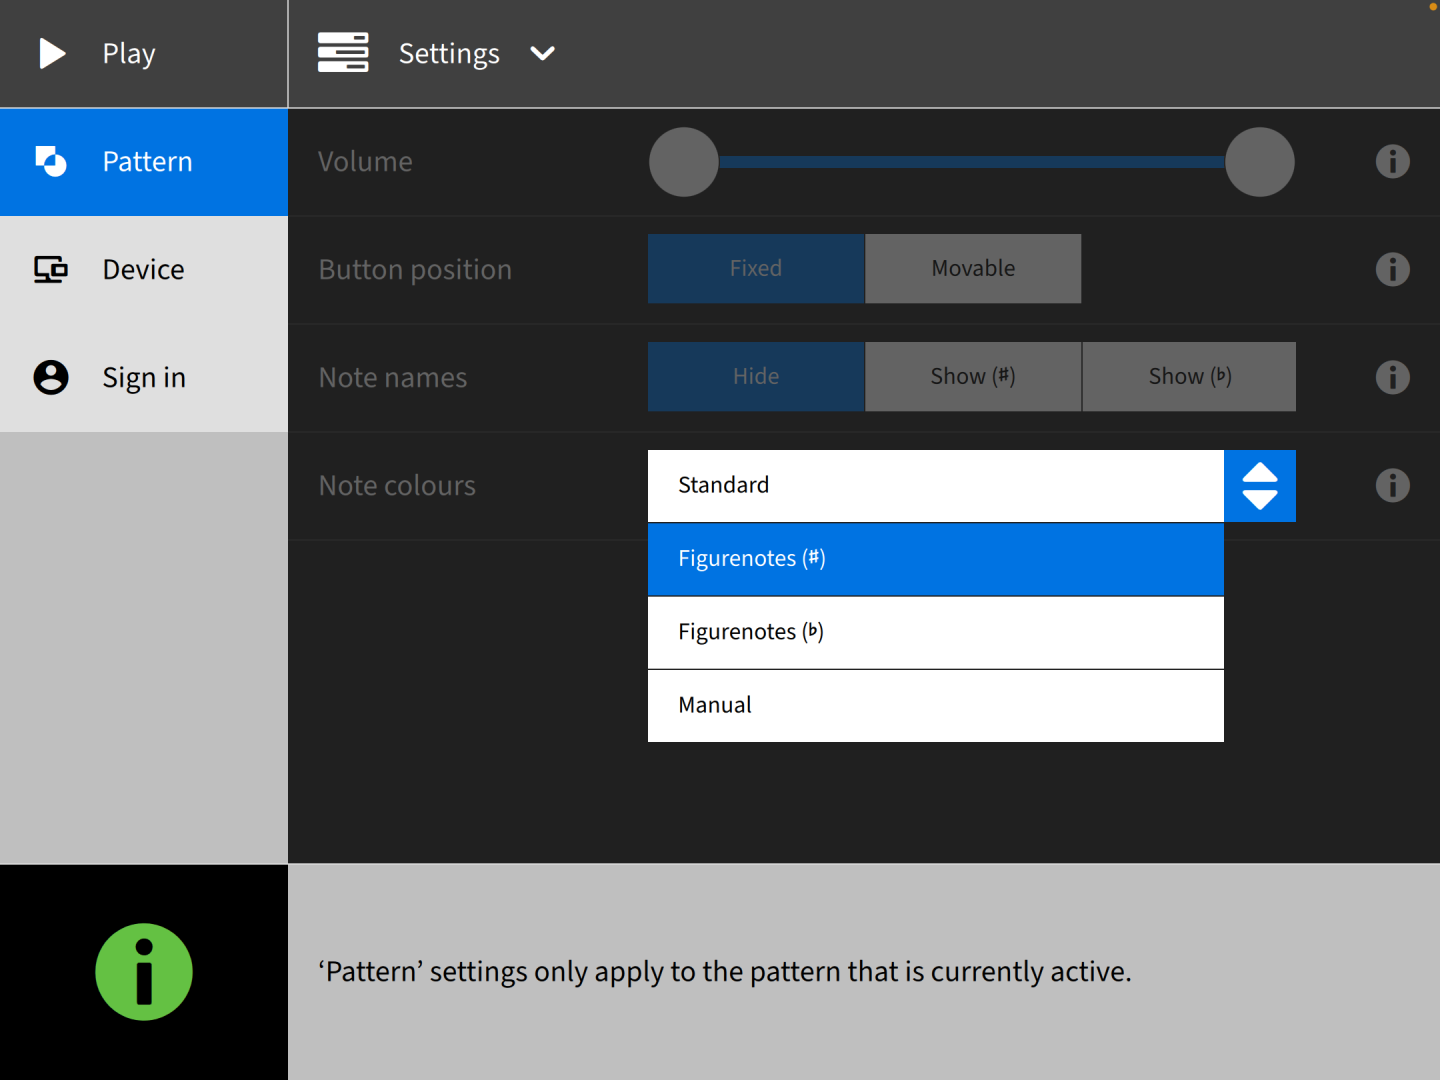
To use Figurenotes colours within your Clarion patterns, go to Settings. You’ll find Figurenotes as an option within the Note Colours dropdown menu.
Clarion Settings
BBC Ten Pieces patterns can be found in the Library, which is shown by a folder icon. Selecting this will open options including a BBC Ten Pieces folder. You’ll find multiple patterns, with descriptions, for both pieces.
Clarion menu for BBC Ten Pieces
It is wonderful to be a part of the latest Clarion developments. Let us know if you are using Clarion and Figurenotes in your work.
Each video tutorial features a different expert from Drake Music Scotland, showcasing plenty of classroom activities, top tips, and creative ideas for you to use with your students.
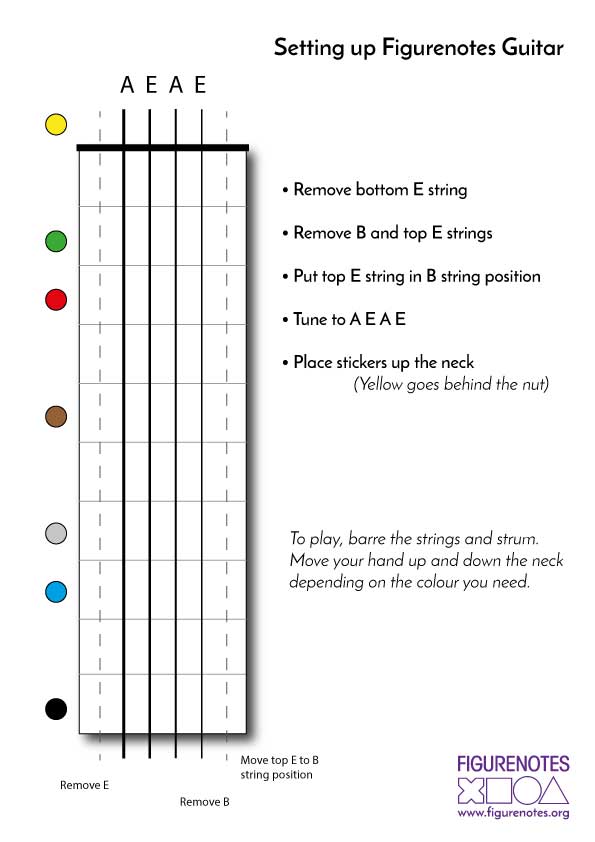
First, Chris Furness showed us how to set up a Figurenotes 4-string guitar, with tips on how to adapt playing technique for different physical needs.
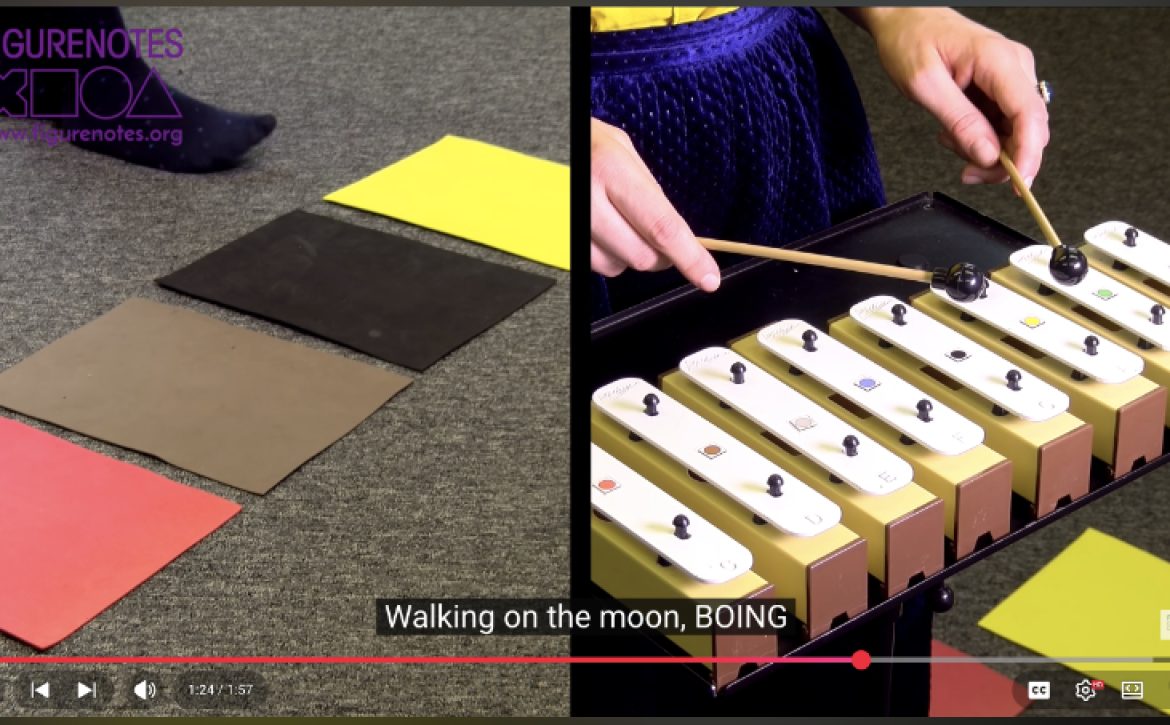
For early years groups, Caitlin Mulgrew guided us through a song with actions, movement games, and composition activities. Who doesn’t love a bit of creative play on the moon?!
This week, Pete Sparkes demonstrates a brilliantly adaptable exercise for improving rhythm and pulse. You can extend this exercise as far as you want, with melody, instruments, silly actions and noises; your imagination is the only limit.
In the final film of the series, Fiona Sharp demonstrates how chime bars can give students a sense of responsibility and control. She brings a hint of Blue Peter into the classroom with a brilliant, musical, art activity.
Rhythm is the heart of Figurenotes. From banging out beats on the drum kit, to beautiful marimba solos, you can work wonders with Figurenotes percussion. With studies showing that musicians using Figurenotes have a stronger sense of pulse and better rhythmic skills, let’s take a look at the different methods of using percussion:
1. Drum kit
2. Pitched Percussion
3. Unpitched Percussion
Drum Kit
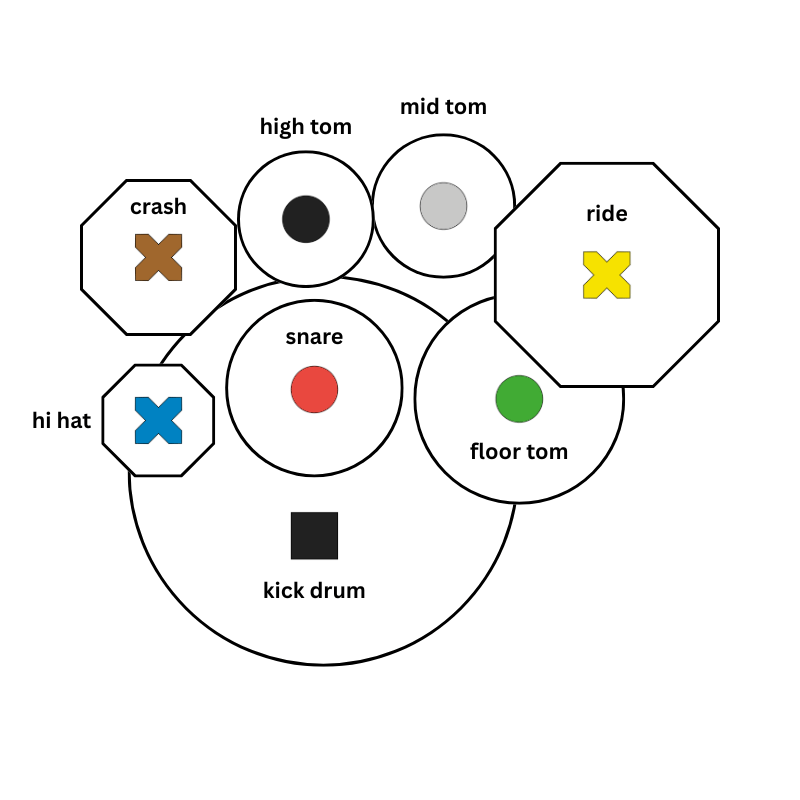
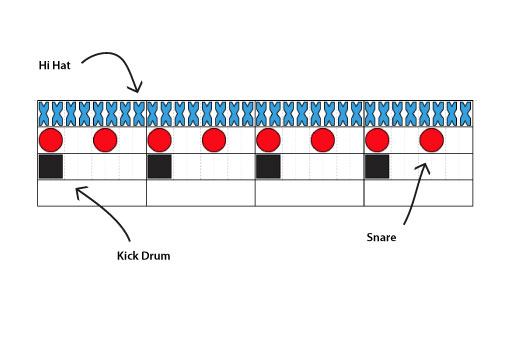
The diagram above shows the structure of both the drum kit and the drum notation.
A black square represents the kick drum. Circles are the snare and toms. Crosses represent the cymbals.
The notation puts these shapes on 3 different lines. Kick drum squares sit at the bottom, circles in the middle, and squares on the top. This echoes both standard drum notation and the physical placement of the kit. This moves onto 5 lines in stage 2 Figurenotes notation.
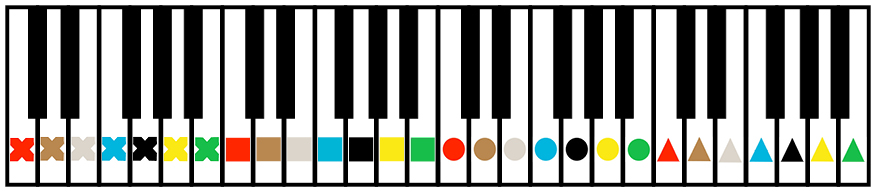
Tuned percussion works in the same way as piano. We place stickers on the instrument and match them to the note on the page. The diagram below shows a piano with Figurenotes stickers. The red circle is middle C.
When learning chime bars and similar instruments, we recommend placing the sticker where the beater will strike. This helps musicians to learn where to play the instrument for the best sound.
You can limit the amount of notes you present by limiting the chime bars you lay out, or removing unwanted notes from a xylophone or glockenspiel.
Unpitched Percussion
Untuned percussion gives you a lot of freedom. You can assign any shape or colour to a sound/instrument. You can choose to add stickers or not.
In some settings, it helps to keep this consistent from week to week. Other times we may want flexibility to change instruments and keep the same parts, for example. This is up to you.
You also have the option of writing each individual part out as a melody line using your chosen colour and shape, or lump parts together into drum kit notation explained above. See what works for you and your musicians.
For more structured untuned percussion, see the drum kit example above.
Figurenotes is perfectly suited to the piano. By placing stickers on the white notes, we make it much easier to see the repeating pattern of notes that the piano has.
Each note has a colour and each octave has a shape. You can see the relationship between notes, while still seeing them as different. Match the note on the page to the sticker on your instrument and you are playing!
Middle C is the red circle in the diagram below. Make sure you get the correct order of colours and shapes when placing your stickers on the keys.
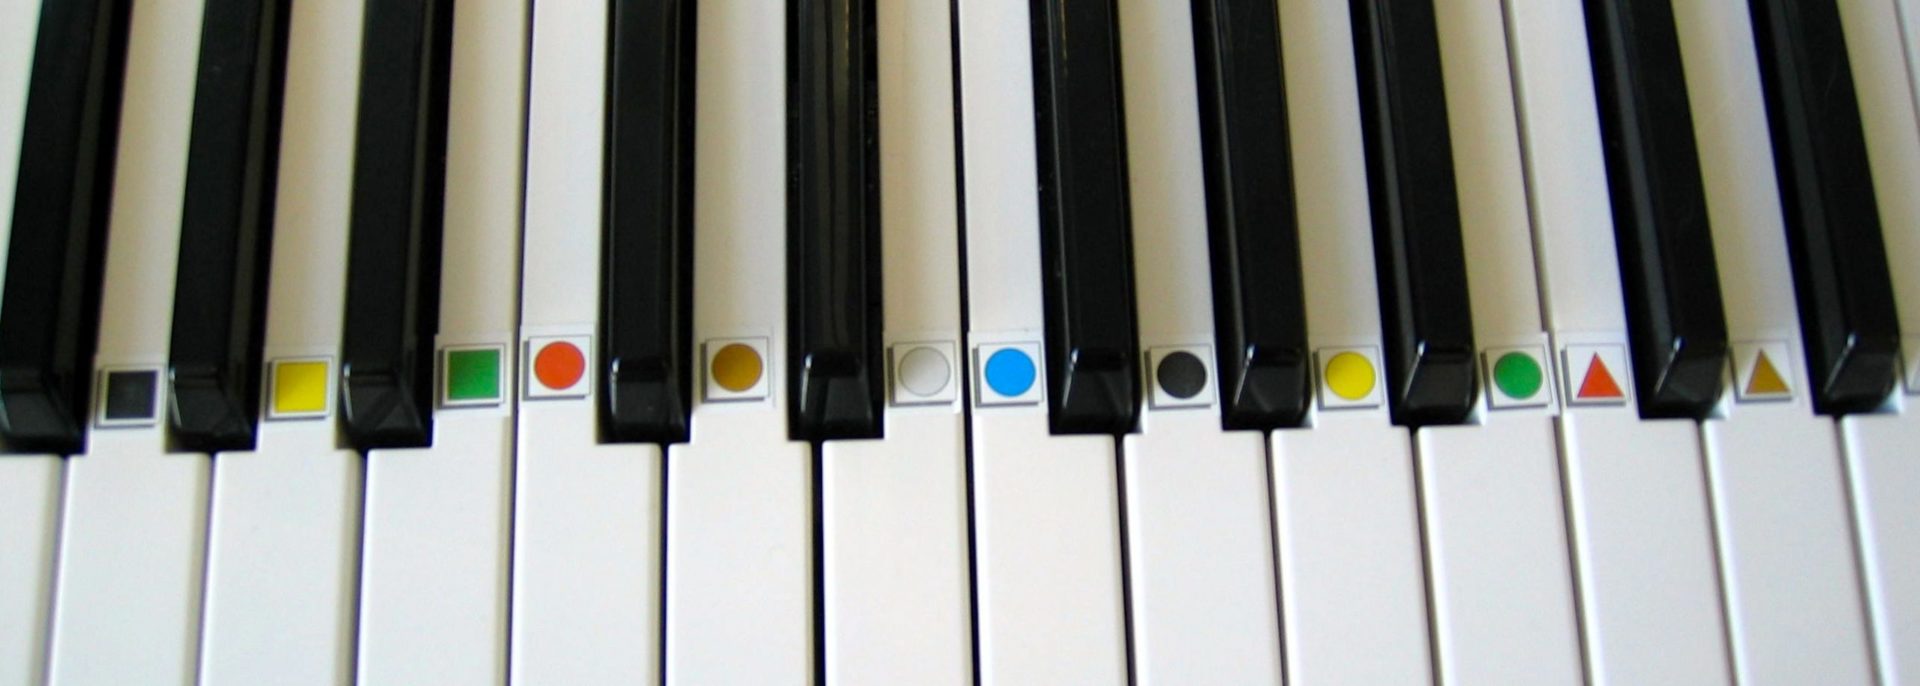
We recommend placing the stickers in line with the tip of the black keys (see photo below). This means that the player can still see the stickers when their hands are in position.
Figurenotes allows you to build chords using small, simple steps.
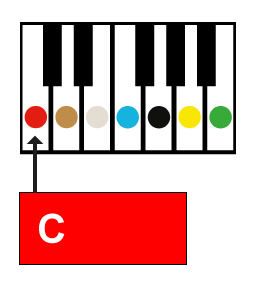
In order to play a chord, we first play the colour of the chord box.
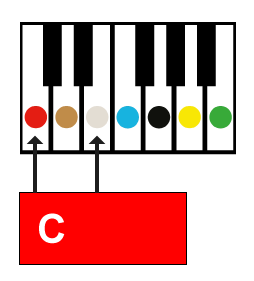
We then find a friend, not a neighbour.
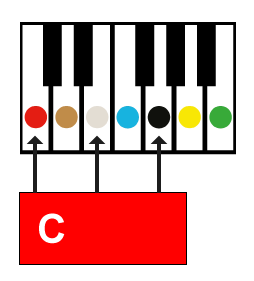
To finish the triad, we play another friend, not a neighbour. This creates your triad.
Start playing your piece with a single note for the chord part, then try 2 notes, then go for the full 3 note chord. Work at your pace.
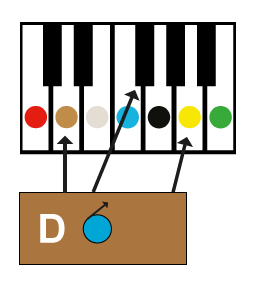
Develop even further by using chords with sharps or flats. You can see in the image below that there is a blue note with an arrow inside the box. This means that if we come across a blue (F), we need to adjust it by moving to the note to the right of it (F#).
Notate allows you to write chord parts and melody parts for either hand, so whether you have a beautiful bass line or some thumping chords, reading the notation won’t be an issue.
There are manyways to learn guitar using Figurenotes. The route you choose will depend on the style of music you want to play, whether you play solo or in a band, and the way that your body works. Today, I am focusing on playing chords.
Figurenotes Guitar
This method is great for bands, as well as those that want to cement the basics of guitar playing fairly quickly. We can use Figurenotes guitar as a good basis for learning to strum, changing the hand position in time, and synchronising the two. You can also play Figurenotes guitar a number of ways, including flat on the lap, which is especially useful for wheelchair users.
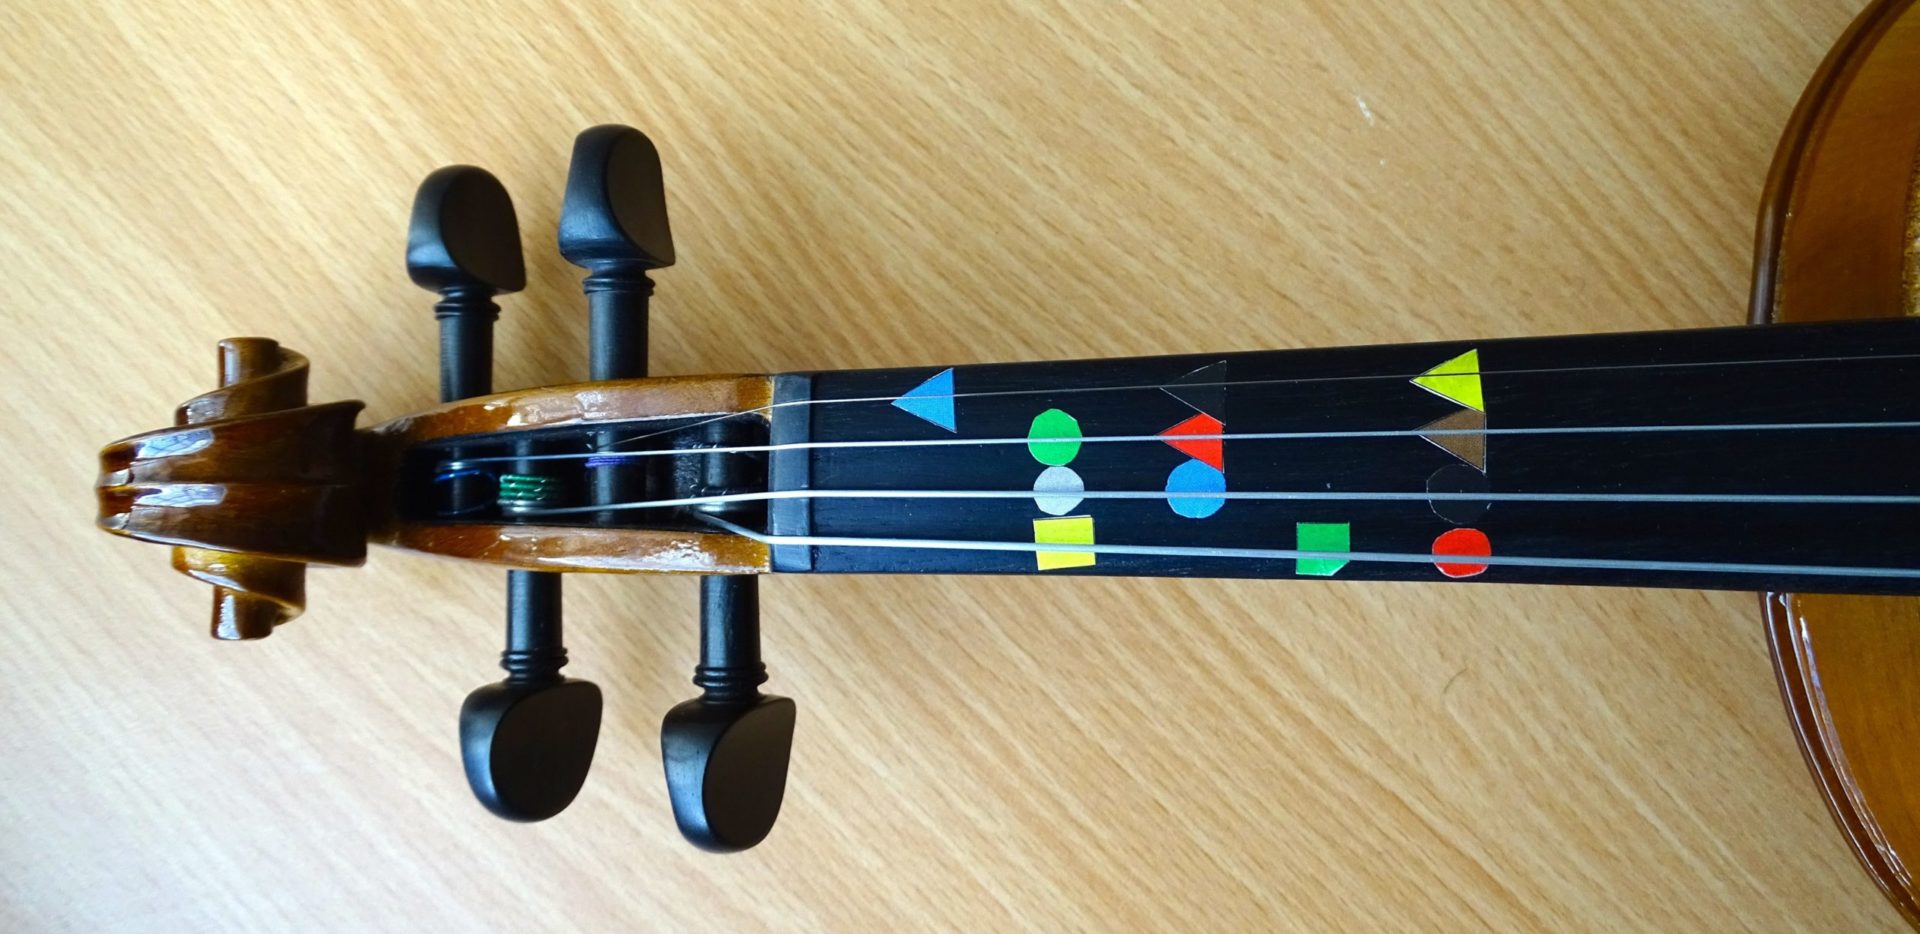
We start with 4 strings – A, E, A, E. This creates a chord with no third, meaning we can play this in our band without worrying about major and minor just yet. We can barre the strings to create different chords. In order to make this easy, we place stickers up the side of the neck, so the guitarist can see the colours clearly. Match the note on the page to the sticker on the instrument and barre where it says. As there are only 4 strings, we can barre more easily than with 6. If strength is an issue, try using more fingers or lay the guitar flat on your lap and use your thumb, a bit like a slide guitar.
Remember that playing this way involves taking off and moving strings, so get your teacher to help you.
Fancy taking the solo? You can see in the video below that there are also stickers on the fretboard by the top string. Use these to play your solo or melody line. The stickers are placed on the natural notes, not sharps or flats.
Traditional Chord Patterns
When teaching standard chord patterns, try putting stickers just in the position of the chord pattern. So, if we start with the chord of D, for example, we might place all brown stickers to show the shape, or we could stick the right colours for the fingered notes, showing the shape of the chord. You might start with two chords and progress on from there.
Once a chord has been learned, try taking those stickers away. We do not recommend keeping lots of stickers on the instrument at once. Move slowly and memorise as much as you can.
Alternative Tunings
There are many different tunings you could try. A good place to start might be D A D A A D.
You can start by playing one finger on just the bottom string, with stickers along the neck. Then try a barre on the bottom 3 strings (or using 3 fingers, if a barre is too much). Only strum the bottom 3 strings. You can also try a whole barre, if you have the strength.
There are further stages you can go through to progress towards a drop D tuning, before finally coming to standard E tuning.
Tune your bass in the standard way. Place some useful stickers, up to the 5th fret for example, on the fingerboard itself, rather than down the neck. Put stickers for the open strings on the other side of the nut. Don’t cover the entire fingerboard in stickers. Only the necessary frets and strings that you will start with. You can add and take away stickers as required.
There are Figurenoters doing some brilliant things with brass. Take a look at Favela Brass in Brazil as a prime example of what can be achieved.
We are in no way dictatorial about how you use Figurenotes with brass instruments, so this blog will be a series of ideas for you to take away. I will focus on the trumpet, for ease, but these methods can be adapted for different instruments.
Teaching brass with Figurenotes can be just the same as with conventional notation. You teach each note, the valves/fingers you use, or the slide position, and associate this with the note/colour. However, if you want to use something to reinforce this learning, try the ideas below.
Resonaari
Resonaari, the Finnish school where Figurenotes was created, uses lines above the notes to show which valves need to be used. Use this to learn the notes and then try to limit their use in pieces. Try to reinforce the colour, maybe the letter name, in order to progress with reading. These lines are easily written on your Figurenotes score using a pencil or marker.
Favela Brass
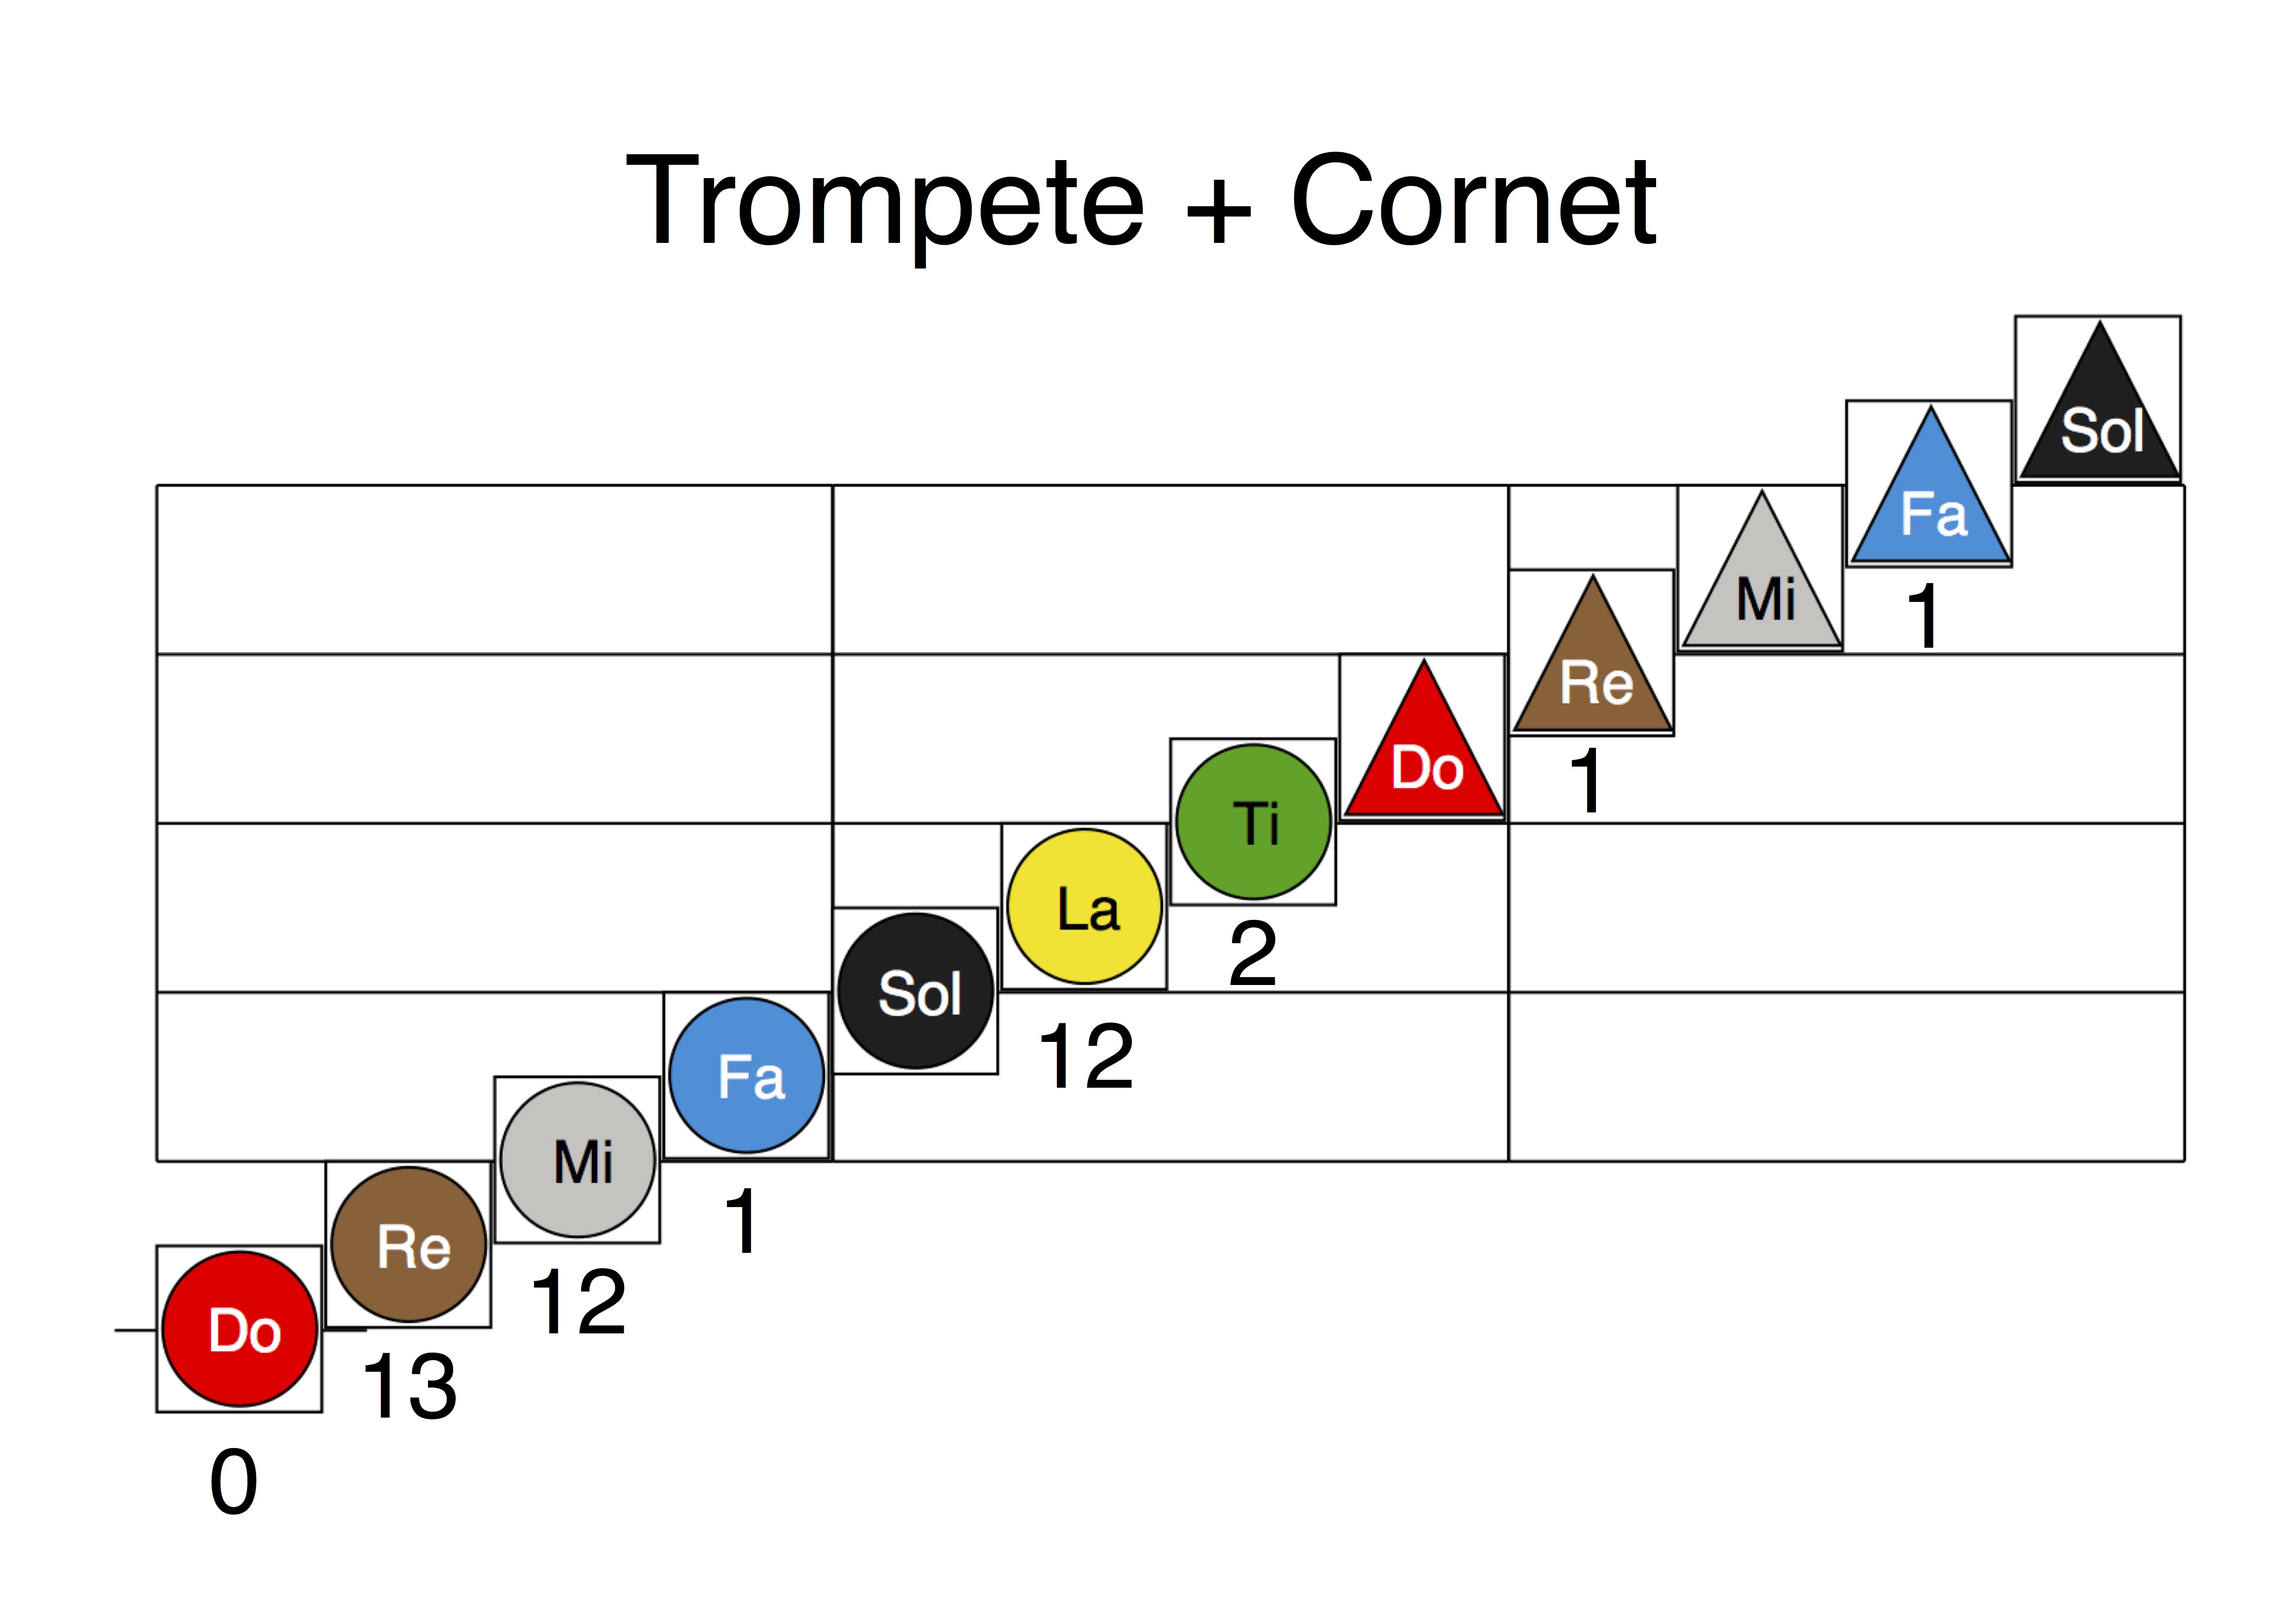
Favela Brass in Rio de Janeiro uses a different method to show how to play each note. They use numbers to show which valves to use. This would also work well for trombone, as you can use the numbers 1-7 for the slide position instead.
We covered transposition in our Working with Woodwind blog, so if you have questions about transposition, I suggest you go back and take a look. Use these tools to help teach individual notes and/or scales.
Teaching with Figurenotes needn’t be vastly different to your normal teaching style. Just as in the woodwind blog last week, you can teach notes in your normal style, but use colour and patterns to reinforce this learning.
Be aware of your pupils’ needs and use the right approach for them. Let us know if you have another way of teaching brass with Figurenotes. We’d love to hear your thoughts in our Facebook group: Figurenotes – Let’s Make Music.
For the second instalment of our mini-series on how to use Figurenotes with different instruments, we will focus on woodwind. In the last blog, we covered strings and how to get started. This focused on violin, but can be applied to viola, cello, and double bass.
Let’s break down the most common questions we hear when discussing Figurenotes and woodwind instruments:
Where do I put the stickers?
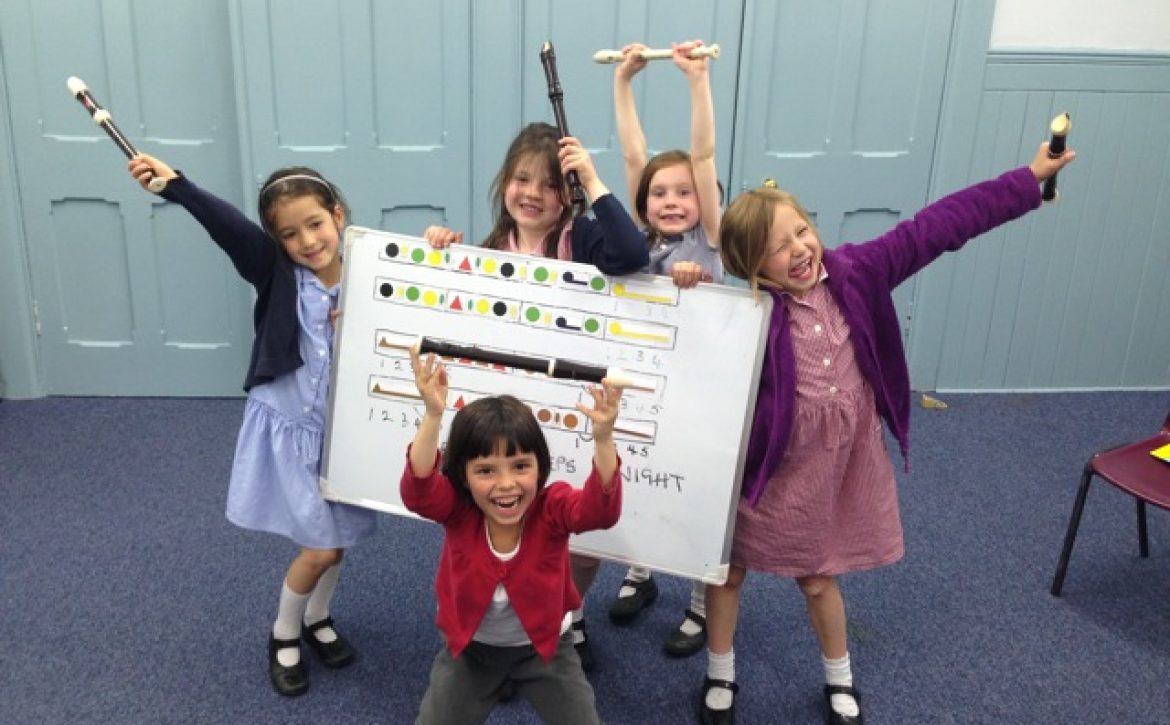
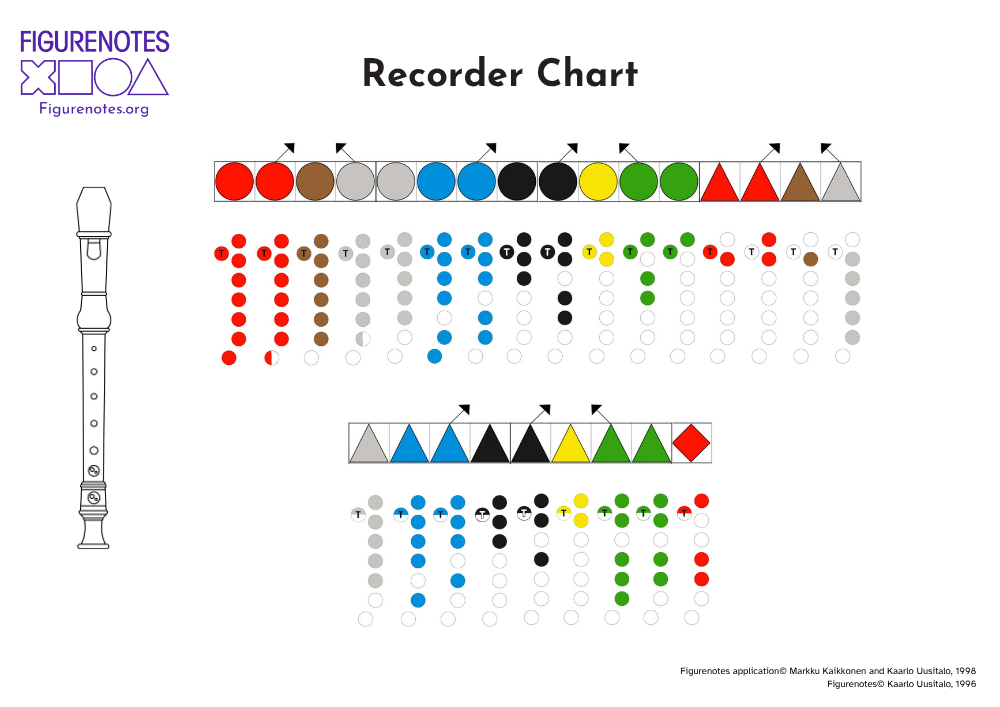
Figurenotes for woodwind is very similar to using standard notation. You teach fingering and notes, just as you would with standard notation. You replace the note on the stave with a Figurenotes coloured shape instead, e.g. B on recorder is a green circle. This means there is no need for Figurenotes stickers when teaching woodwind. The colour helps the pupil to distinguish between notes, which builds up a strong association between note and finger pattern. It is up to you whether you call it by the letter name or the colour (or a bit of both). You can also put the letter name within each Figurenotes shape using Notate, our notation programme.
When we consider transposition using Figurenotes, there are two schools of thought:
• Concert C is always red.
This is great if you’re only planning on working in stage 1. It is much easier in a band session to call just one colour. However, there are drawbacks to this. You would hope to change these colours when you come to progress through stages 2 and 3. You should also be aware that notes that are fairly simple for many instruments can be very complicated on woodwind instruments.
• Written C is red
This is the best way to allow progression on your instrument. Progressing through stages 2 and 3 to standard notation is easy and follows the same colours throughout. It is also good to teach new notes in a sensible order. It can be a little more complicated for the leader in band practice, but as long as everyone learns what their part is, it works really well.
This series of blogs will focus on using Figurenotes with different instrument families. Let’s get started with strings.
There was a wonderful pilot project, when Figurenotes first came over to Scotland, at Greenmill Primary School. This research project was a joint venture between Drake Music Scotland, RSAMD (now RCS), and East Ayrshire Council. Chris Gray, now a Programme Director and Senior Lecturer at University of Aberdeen, brought together two groups of musicians in their last year of primary school. Each pupil was given a string instrument to play in their new string orchestra. One group learned using Figurenotes and the other learned using standard notation.
‘The Figurenotes class progressed in relation to reading and rhythmic security at least two months in advance of the class learning with conventional notation.‘ (Christopher Gray, Greenmill Strings Project Report)
‘Figurenotes as a method also supported the development of bowing technique, with particular reference to bow distribution and control. The visual relationship between Figurenotes and bowing technique ensured that students in the Figurenotes class found it easier to develop these skills.’ (Christopher Gray, Greenmill Strings Project Report)
This orchestra went on to play with Nicola Benedetti, Colin Currie, Sir James MacMillan, and many more! They played at both Holyrood and Westminster parliament buildings. All the musicians progressed to standard notation, with the Figurenotes group never losing the strong sense of rhythm they had built up at the start of their learning. Take-up of non-string instruments also increased, so music provision in the area has improved, and more people have access to music. A huge success!
How do we start?
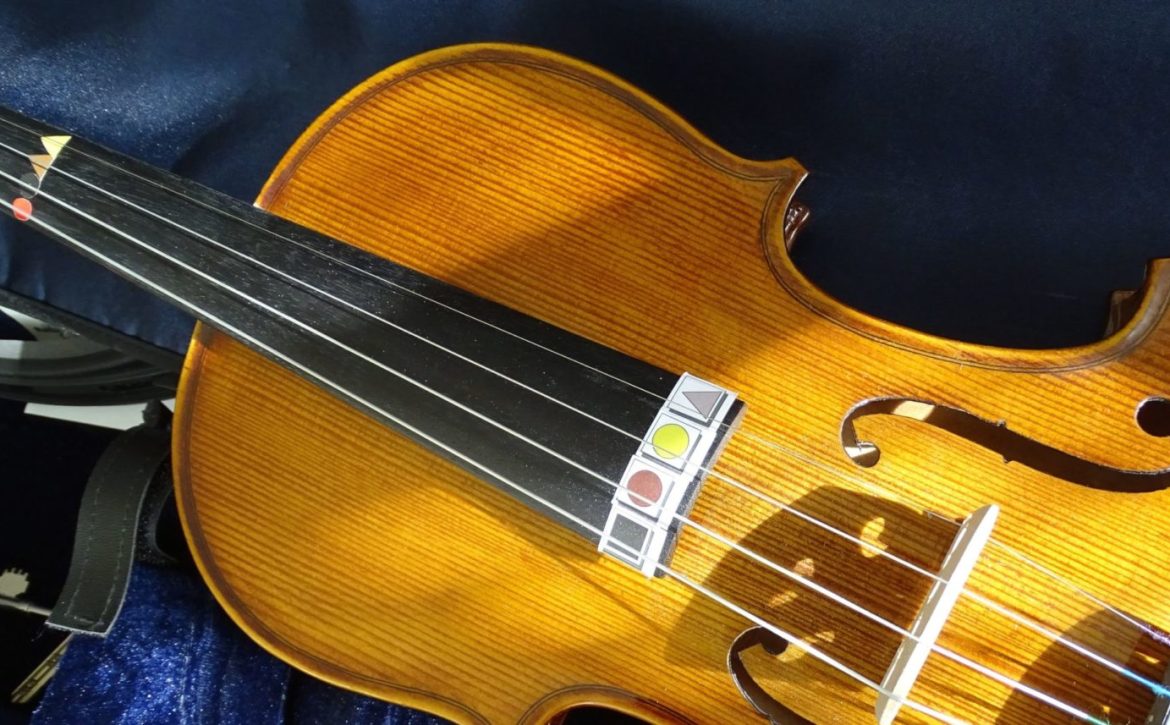
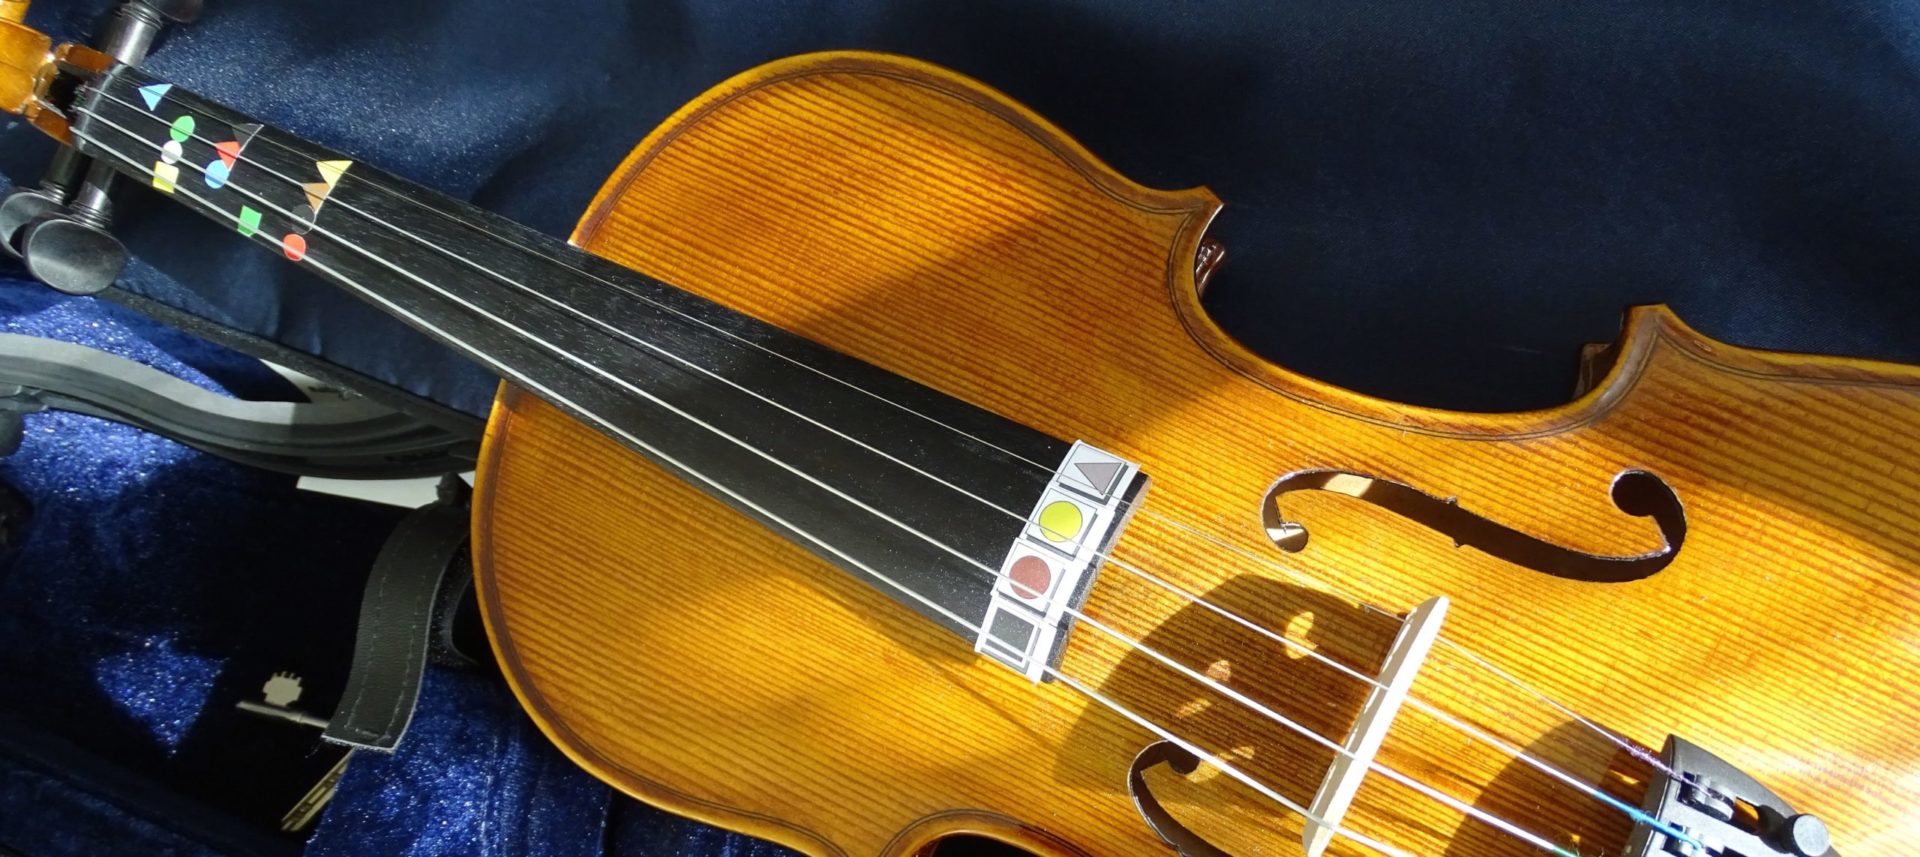
We start with open strings. Place a sticker at the end of the fingerboard, nearest the bridge, for each string. You can also place the open string stickers on the bridge itself. Take a look at the photos below to get a better idea. You can play using just these stickers for a while, to build up your technique and sense of rhythm and pulse. This also helps to focus your pupil’s eyes on the point where the bow meets the string, which helps create a good tone and bow control.
When you are ready to proceed to using fingers, try placing stickers on the ‘natural’ notes. This is slightly different to the way a lot of teachers use stickers on string instruments. Often, we will place stickers where the fingers will go. By using stickers on the natural notes, you encourage the ear while sneakily teaching a little music theory at the same time. Take a violin E string, for example; as a beginner, we will learn to play an F# on this string before we learn F. In Figurenotes, an F# is blue with an upwards arrow. If we are teaching this upwards arrow from the start, accepting this as an F# and knowing what that means in practical terms, we are sneaking in these abstract concepts in a very concrete way from the beginning.
If you still want the help of sticker strips to aid finger/thumb placement, use a non-Figurenotes colour, such as white. Place this underneath the Figurenotes stickers.
Emily MacQuarrie tells us how she easily overcame the fact that the colours of tuned percussion don’t always match up with Figurenotes.
I am a music teacher at Drummond School Inverness, a school for pupils aged 3-19 who have additional support needs. All of our pupils have severe learning difficulties and many have severe and complex needs.
I first started using Figurenotes two years ago and it is now used in both the primary and secondary departments. In my experience, Figurenotes has allowed pupils to access music in new and creative ways. It enables pupils, regardless of learning disabilities, to read and play music. I have found it very successful, both on a one-to-one and a group basis, with pupils able to play pieces of music together. This would not have been possible without the use of Figurenotes. In addition, Figurenotes supports successful learning experiences and builds pupil confidence and does not lead to the frustrations and difficulties that pupils often experience when learning to read and play music.
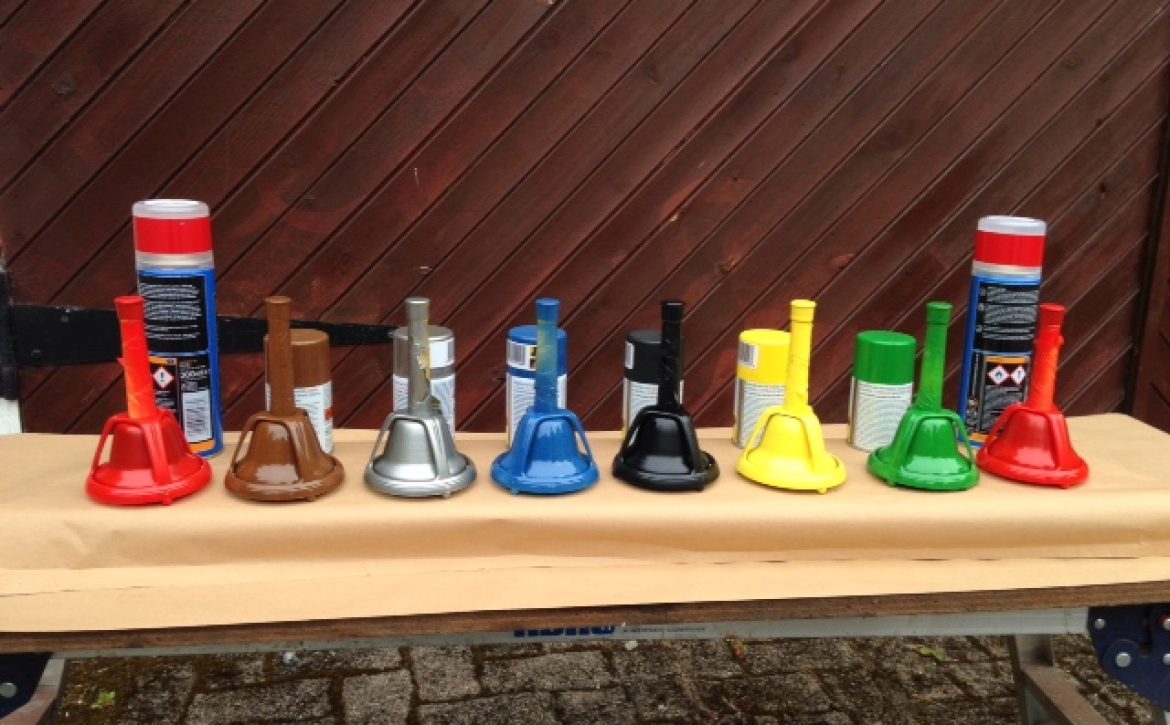
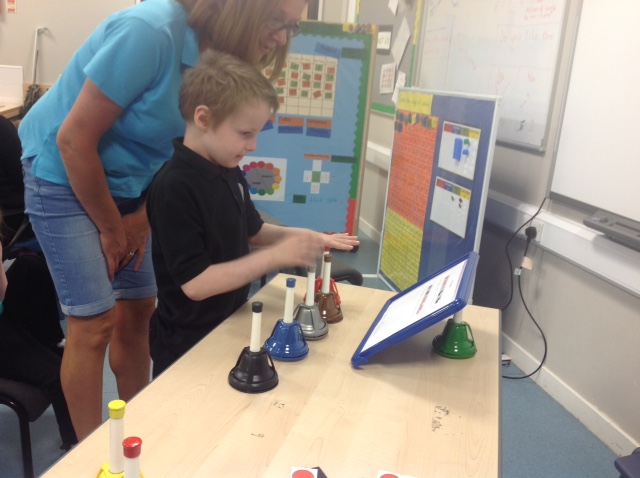
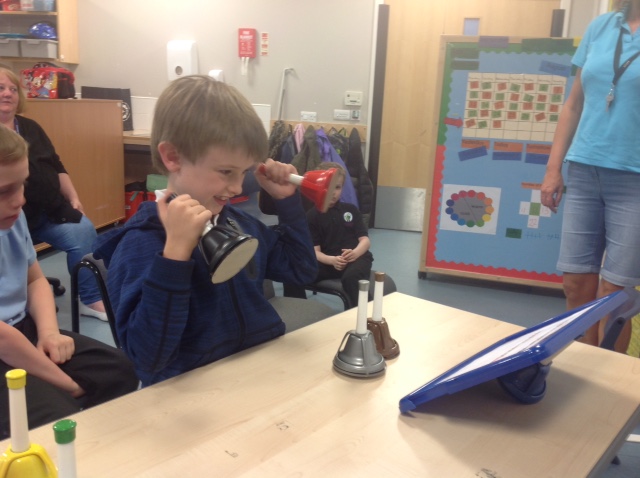
When teaching early years and lower primary I often use colourful tuned percussion, as it is much more visual and captivating for the younger children. A problem that I encountered was that the rainbow bells, boomwhackers, and chime bars are different colours to the Figurenotes colours, which can cause some confusion. Recently I have repainted my rainbow bells so I now have a Figurenotes hand bell set. This has enabled me to introduce Figurenotes into early years, which has been so beneficial. It is amazing watching the pupils’ sense of achievement when they have managed to play a melody they already know well using the hand bells or chime bars.
In order to repaint the hand bells, I bought plastikote spray paint cans in the Figurenotes colours. I taped up the white handles with decorators tape and sprayed each bell with three to four coats, leaving 40 minutes between each respray.
I also screwed plastic bottoms on the bells so that little fingers could not pull the spring mechanism. For this I used the single coffee filter cup lids fixed to the base using existing holes on the base of the bell.
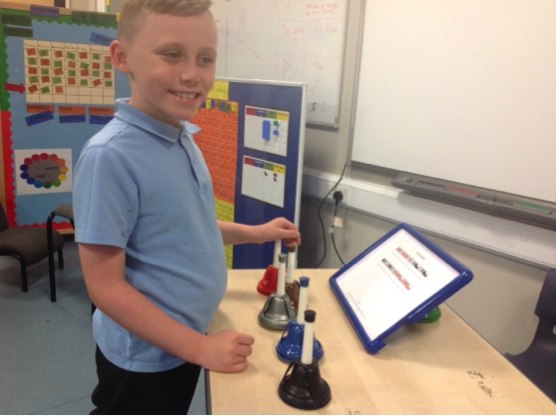
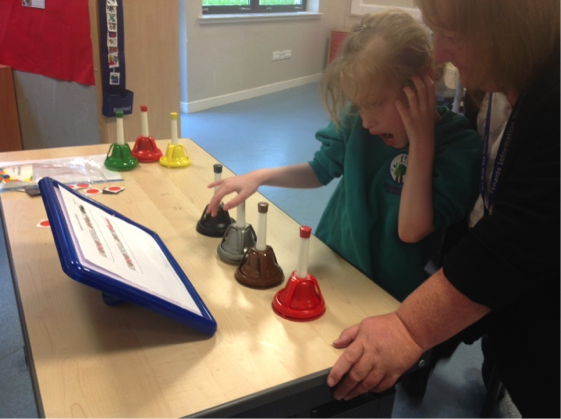
Here are a few photographs of the bells being used in one of the classes at Drummond School: