Prioritising the Piano
Figurenotes is perfectly suited to the piano. By placing stickers on the white notes, we make it much easier to see the repeating pattern of notes that the piano has.
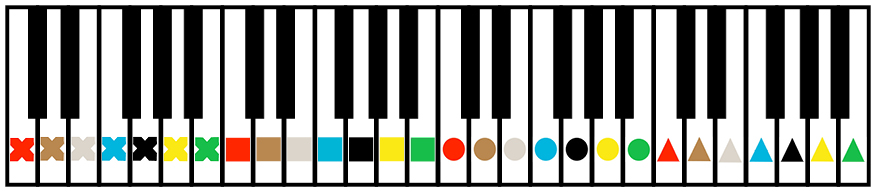
Each note has a colour and each octave has a shape. You can see the relationship between notes, while still seeing them as different. Match the note on the page to the sticker on your instrument and you are playing!
Middle C is the red circle in the diagram below. Make sure you get the correct order of colours and shapes when placing your stickers on the keys.
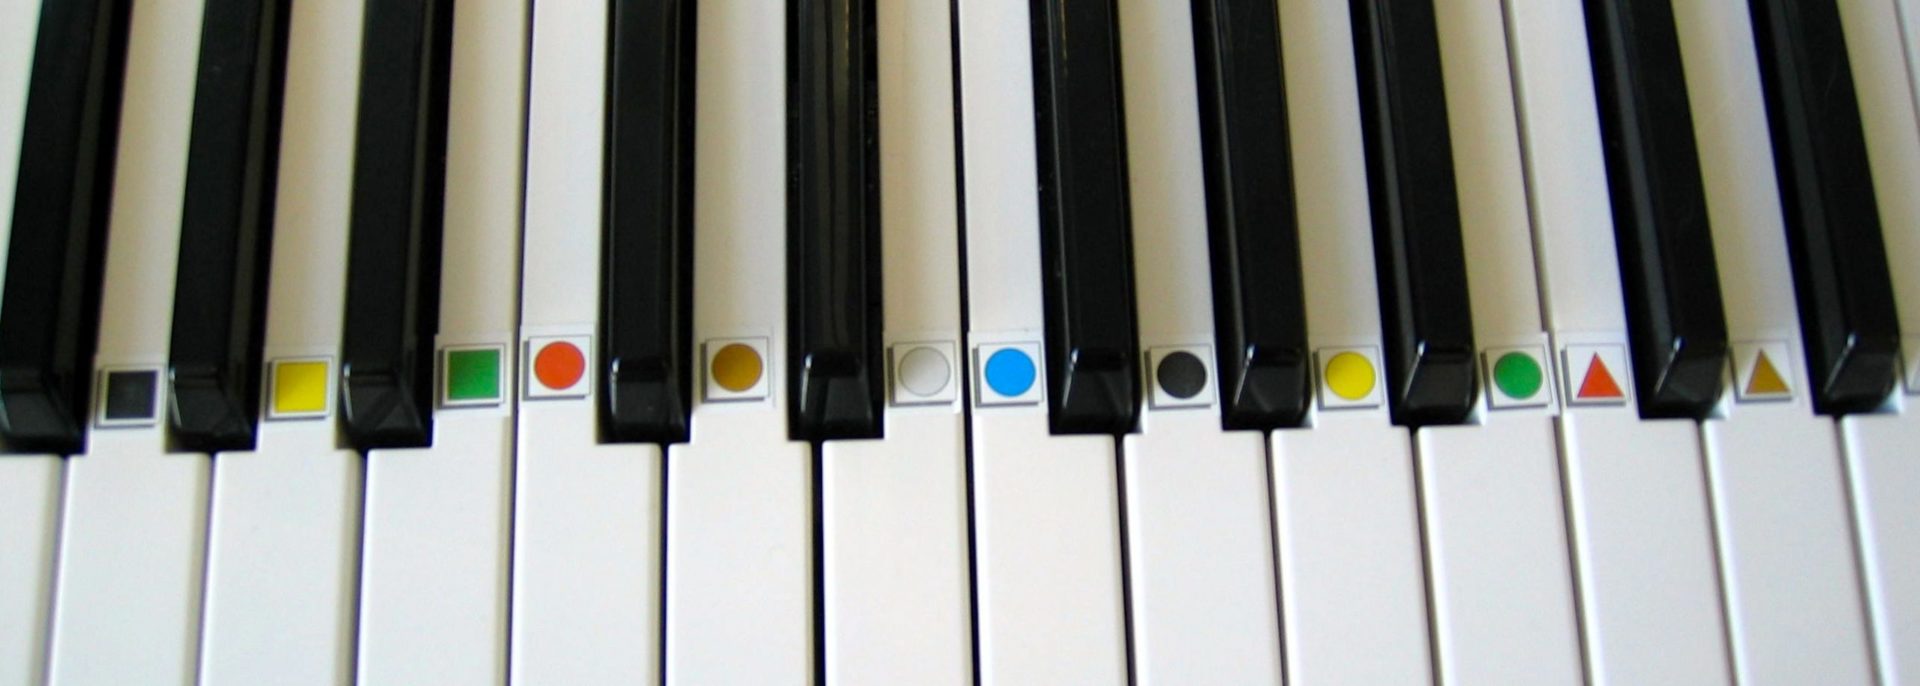
We recommend placing the stickers in line with the tip of the black keys (see photo below). This means that the player can still see the stickers when their hands are in position.
Sharps and flats are easily explained by moving your hand in the direction of the arrow. For more information on sharps and flats, see that section of our website.
Figurenotes allows you to build chords using small, simple steps.
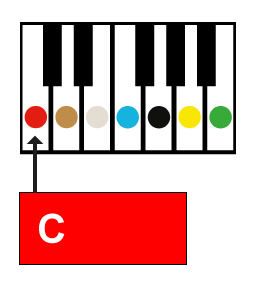
In order to play a chord, we first play the colour of the chord box.
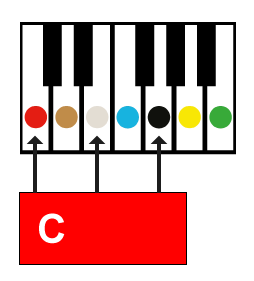
We then find a friend, not a neighbour.
To finish the triad, we play another friend, not a neighbour. This creates your triad.

Start playing your piece with a single note for the chord part, then try 2 notes, then go for the full 3 note chord. Work at your pace.
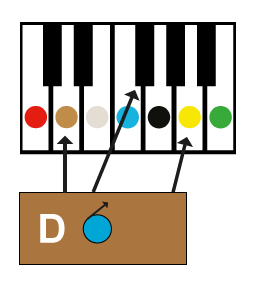
Develop even further by using chords with sharps or flats. You can see in the image below that there is a blue note with an arrow inside the box. This means that if we come across a blue (F), we need to adjust it by moving to the note to the right of it (F#).
Notate allows you to write chord parts and melody parts for either hand, so whether you have a beautiful bass line or some thumping chords, reading the notation won’t be an issue.